Guide
How to securely wipe and resell your old workstations, with no IT team
Prefer to watch? Follow along with the video
Plays from YouTube in privacy-enhanced mode. Nothing loads from YouTube until you press play.Chapters & transcript
You have a stack of old desktops or laptops to sell, trade in, or hand to a refurbisher. Before any of them leave the building, the data on them has to be gone. Not “deleted,” not “reformatted,” actually gone, and ideally with something in writing that proves it. This guide walks you through doing that yourself, in a few minutes per machine, with no IT department and no special training.
Why deleting and reformatting are not enough
When you delete a file or even reformat a drive, the data is not really removed. It is just marked as space that can be reused, and until something writes over it, free recovery tools can pull it back. That means old client files, saved logins, emails, and financial records can still be lifted off a machine you thought was empty. For a business, a drive that walks out the door with recoverable data on it is a real liability, and “we deleted everything” is not much of a defense.
Proper sanitization actually removes the data so it cannot be recovered, and just as importantly, it gives you a record that the job was done.
What you walk away with
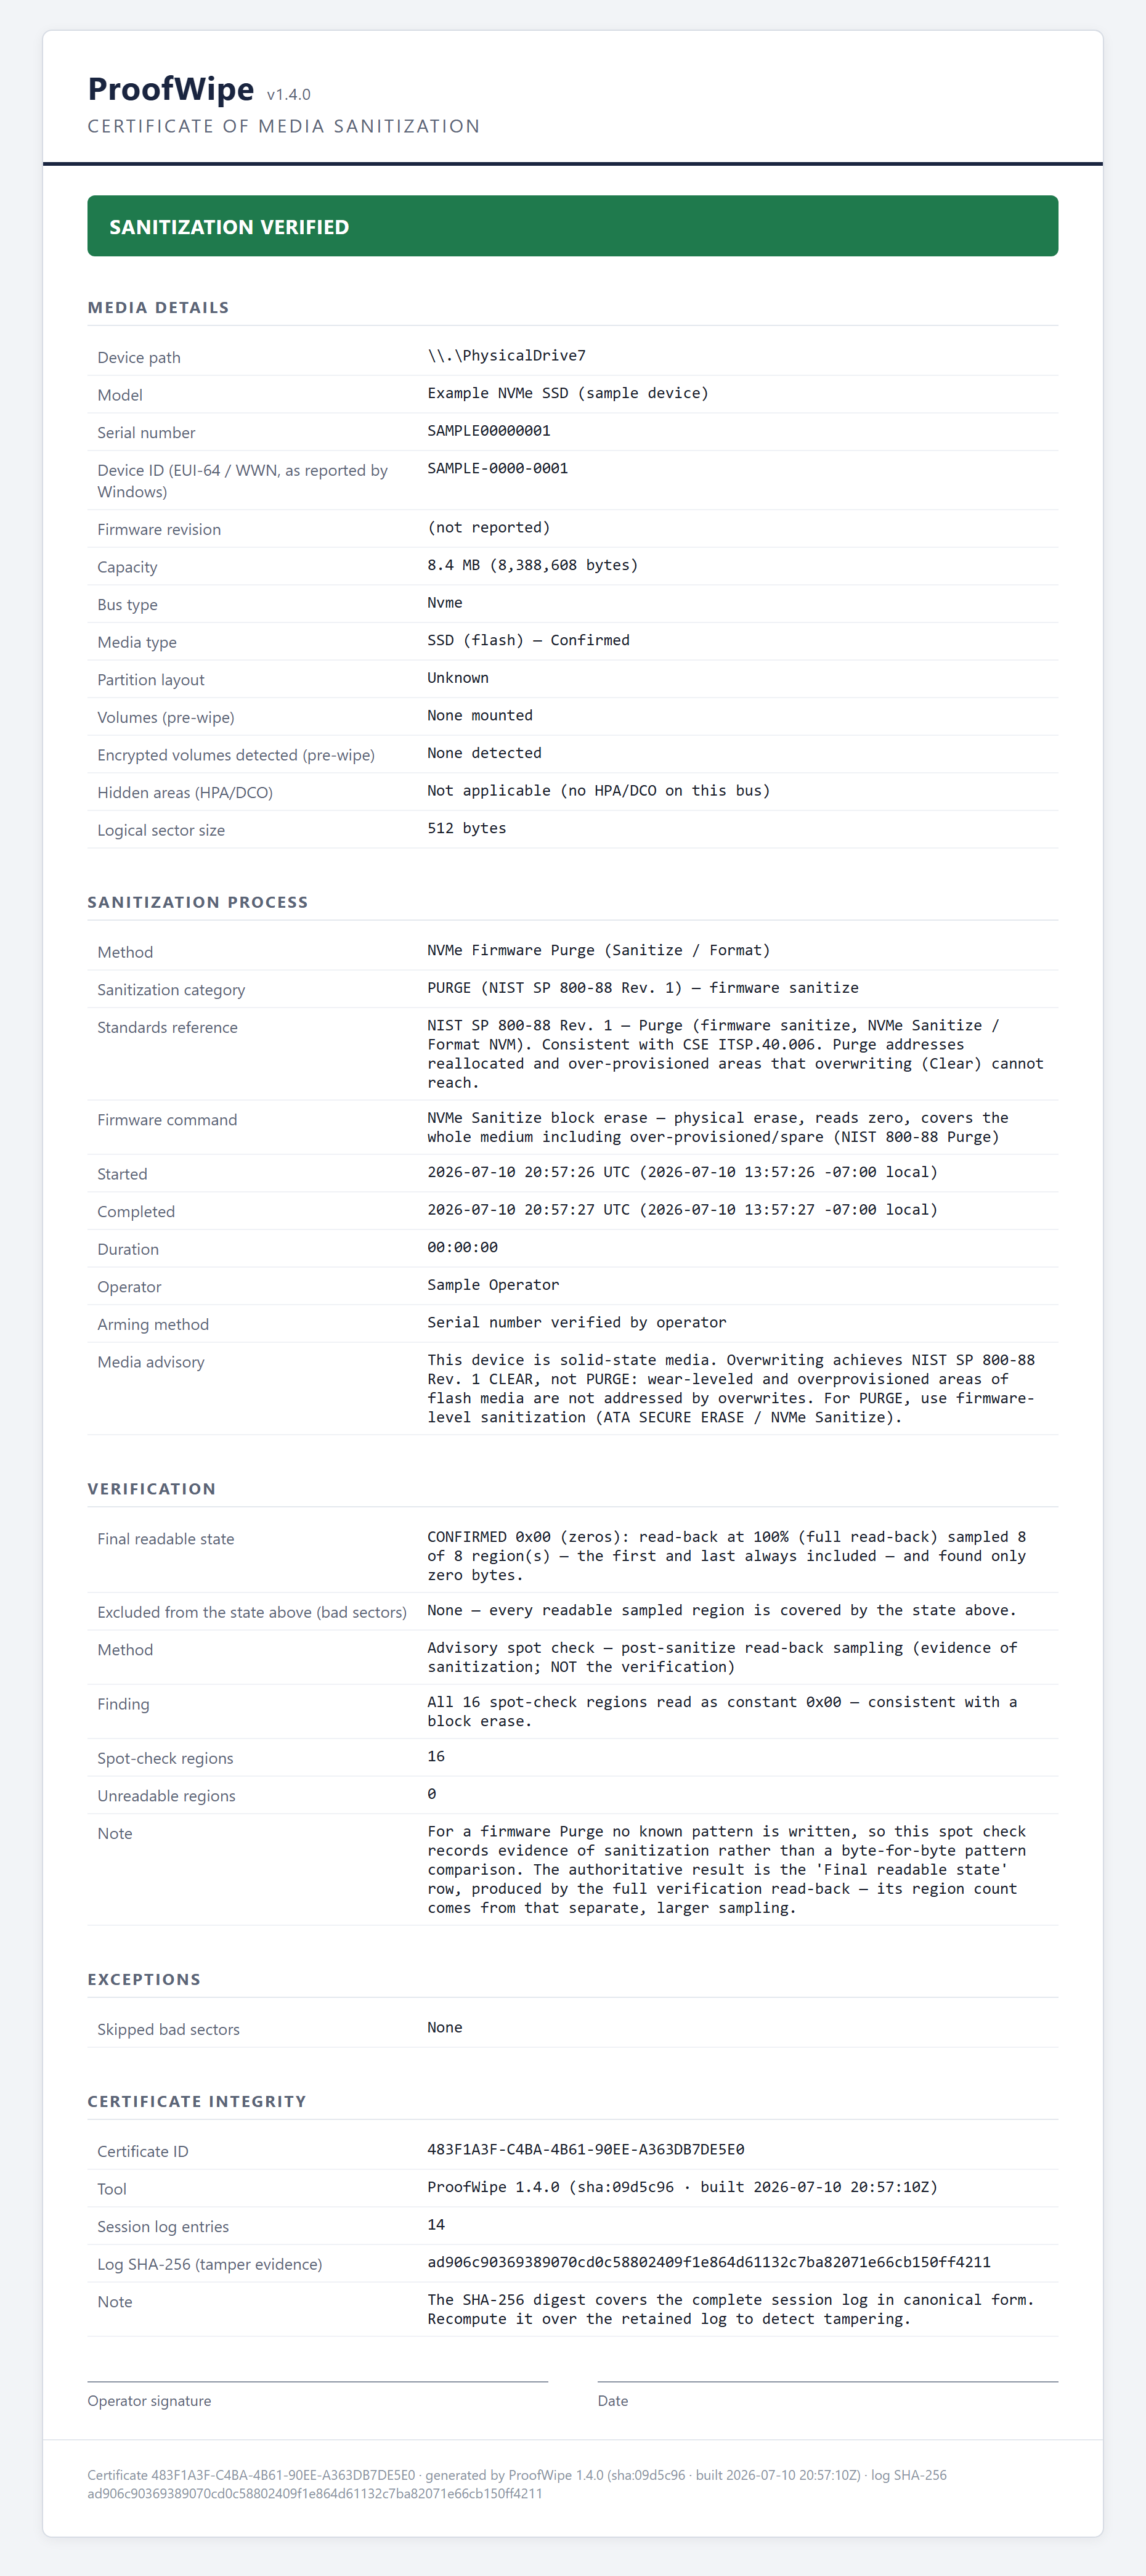
For every machine you wipe, you get a certificate. It lists the exact drive and its serial number, the method used, the read-back verification result, and the date and time. It carries a tamper-evident fingerprint, so if anyone ever altered it, the fingerprint would no longer match. You can hand that certificate to the buyer, keep it in your records, or produce it if a client or auditor ever asks how you disposed of their data. That is the difference between “we wiped it” and proof that you did.
What you need
You need three things: any working Windows PC to build the tool, a blank USB stick that is 2 GB or larger (building the stick erases it, so use a spare), and ProofWipe.
Step 1: Make the bootable USB stick
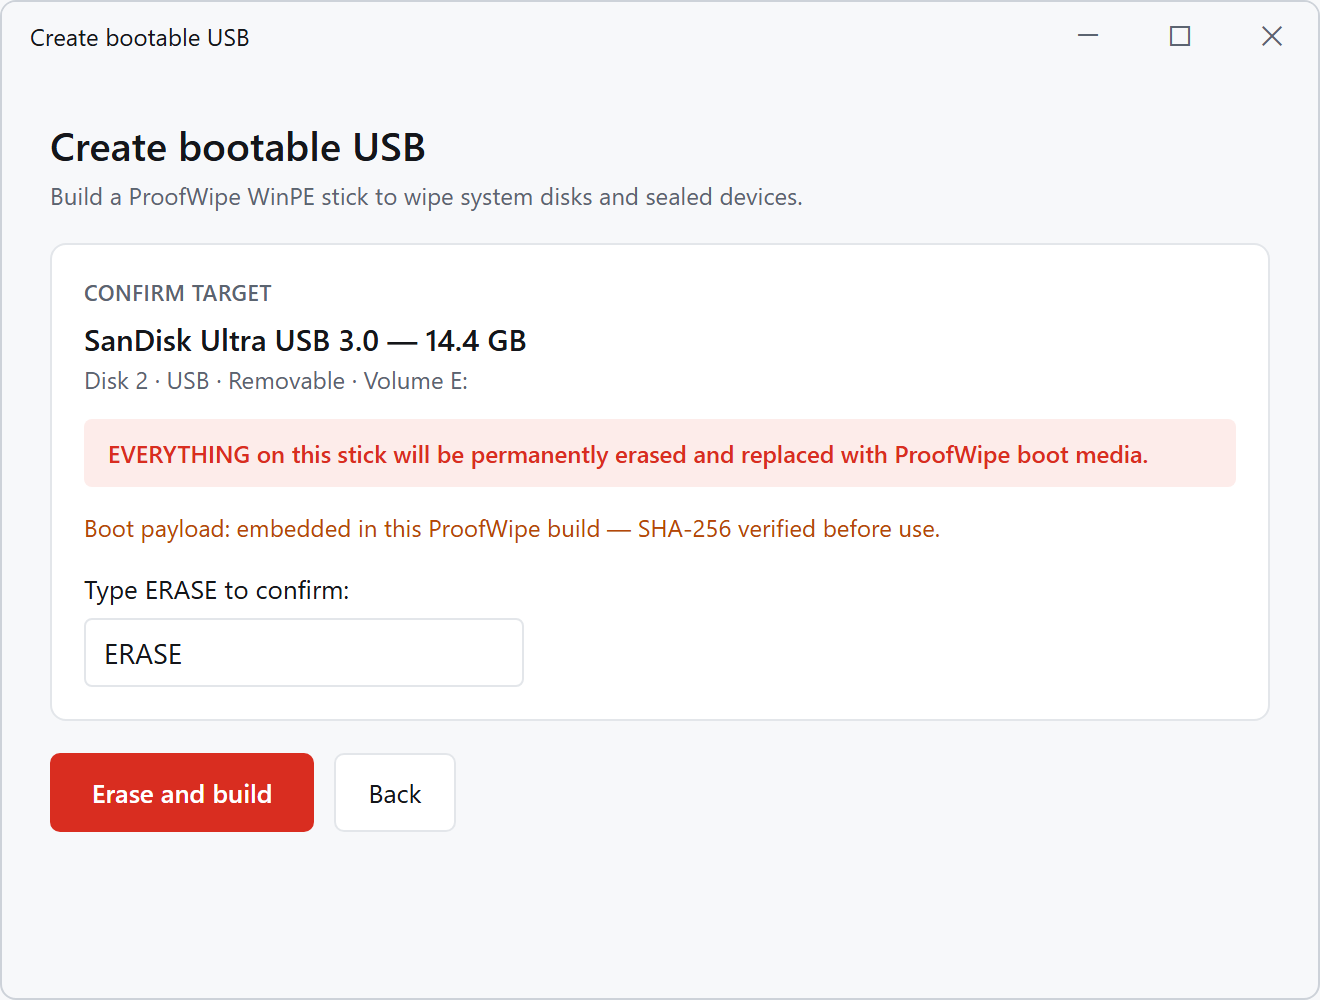
On any PC that has ProofWipe installed, plug in your spare USB stick, open Create Bootable USB, and pick the stick from the list. ProofWipe formats it, loads a small self-contained wipe tool onto it, and copies your license across. This takes a couple of minutes. When it is done, you have a reusable “wipe stick” that you carry from machine to machine.
Step 2: Start the machine from the stick
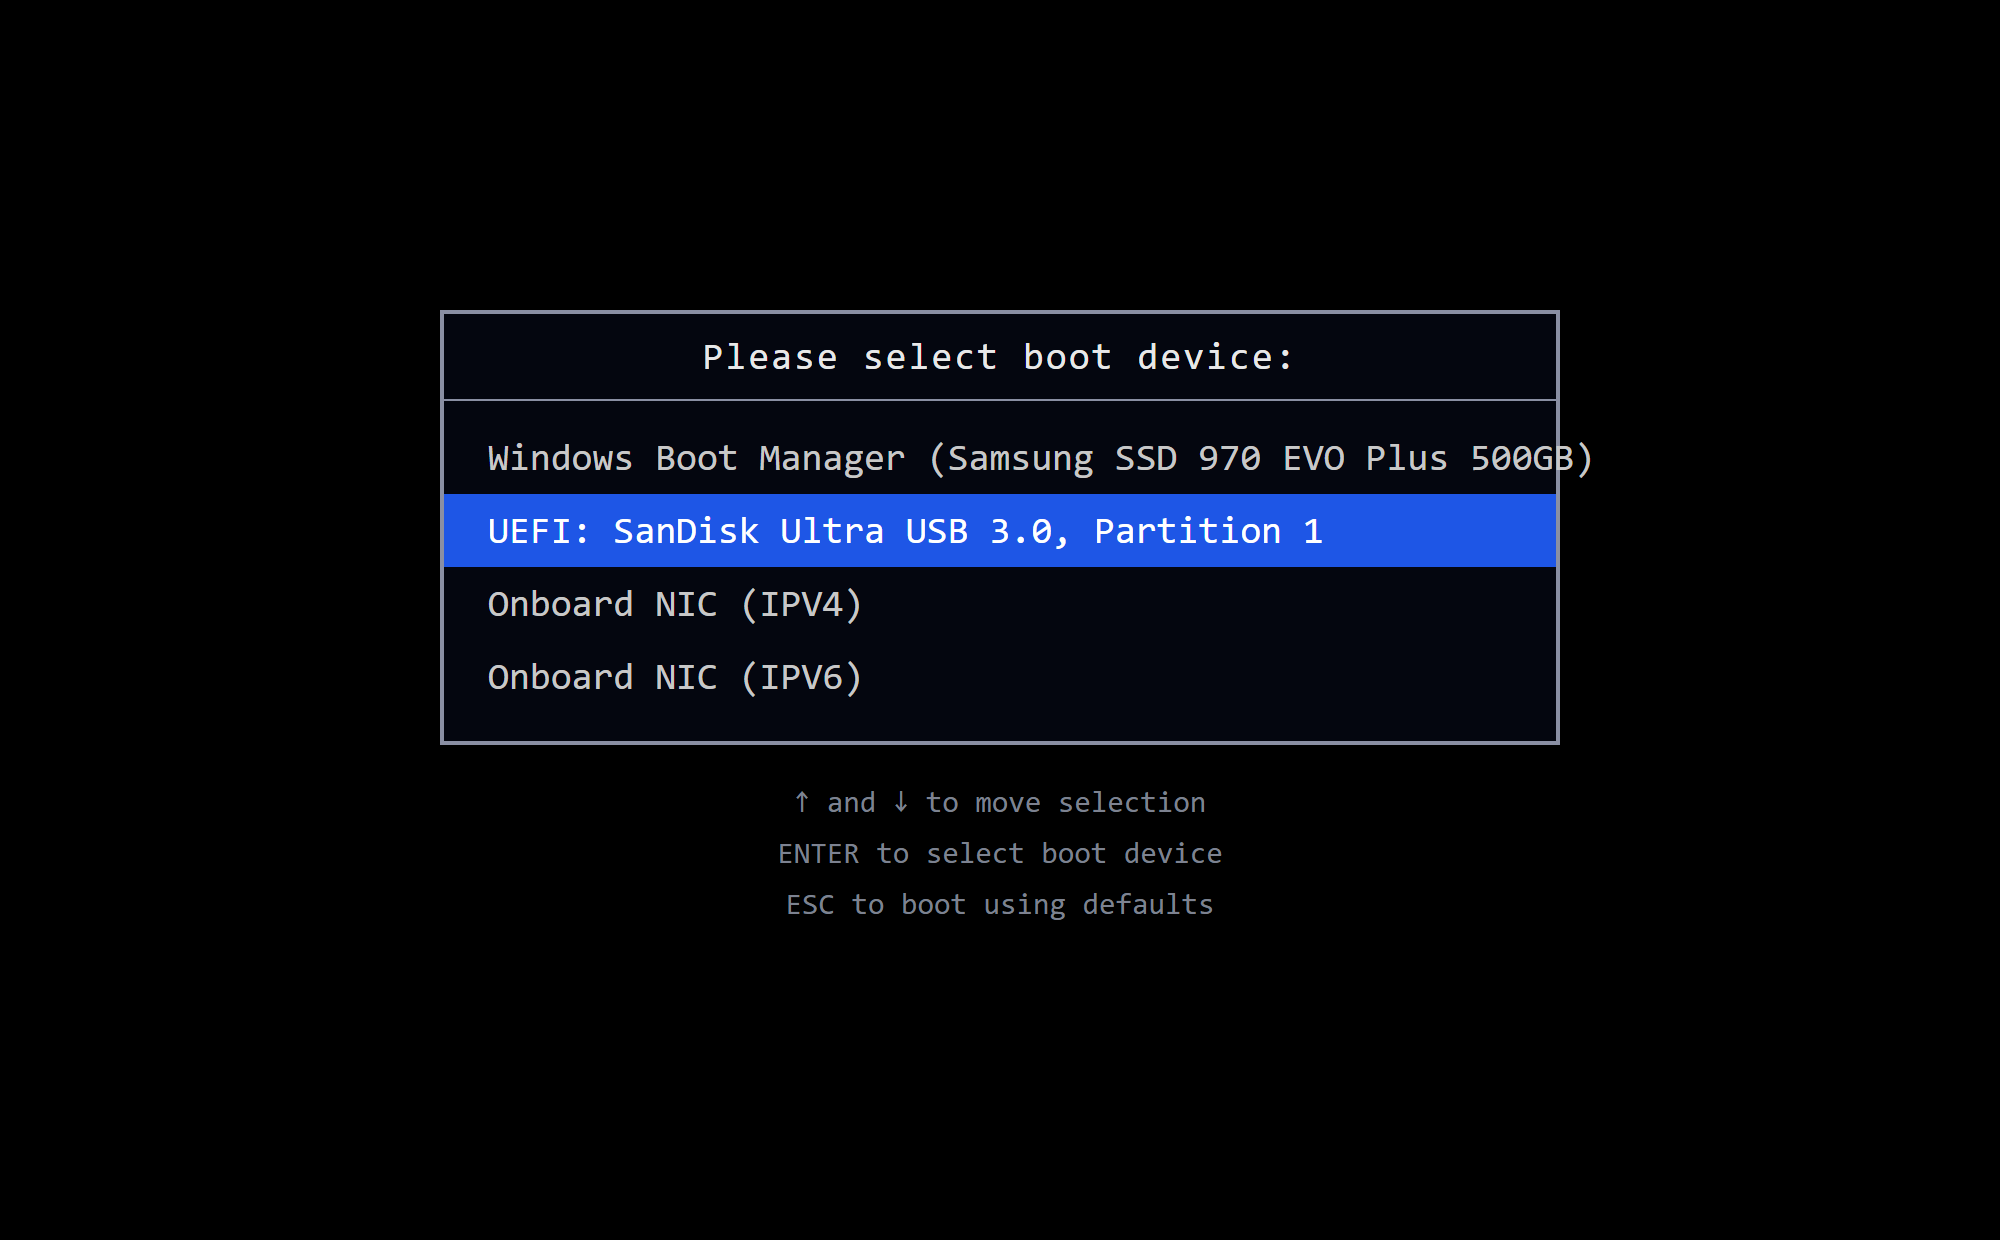
Take the stick to the computer you are selling and plug it into a USB port. Turn the machine on, and as it starts, tap the boot menu key. On most computers that is F12, though some use F9, F10, or the Escape key. Pick the USB stick from the menu, and the machine starts up in ProofWipe instead of Windows. This is what lets you wipe the machine's own main drive, the one Windows normally runs from.
A few machines, Microsoft Surface especially, will not boot from a USB stick until you turn off a setting called Secure Boot in their UEFI (firmware) settings. If the stick does not show up or the machine refuses to start from it, go into the UEFI settings, turn Secure Boot off, and try again. Turn Secure Boot back on afterward, once the wipe is done.
| Brand | Boot menu key | UEFI / firmware settings |
|---|---|---|
| Dell | F12 | F2 |
| HP | F9 or Esc | F10 |
| Lenovo | F12, or the Novo button on some models | F1 or F2 |
| Microsoft Surface | Hold Volume Down, press and release Power, keep holding Volume Down | Volume Up + Power |
| ASUS / Acer | F12 or Esc | F2 or Del |
| Other | Try F12, F9, Esc, F2, or Del at power-on | F2 or Del |
Important: this erases everything on that machine's internal drive, and there is no undo. Make sure it is the right computer and that anything you still need has already been saved somewhere else.
Step 3: Confirm you have the right drive
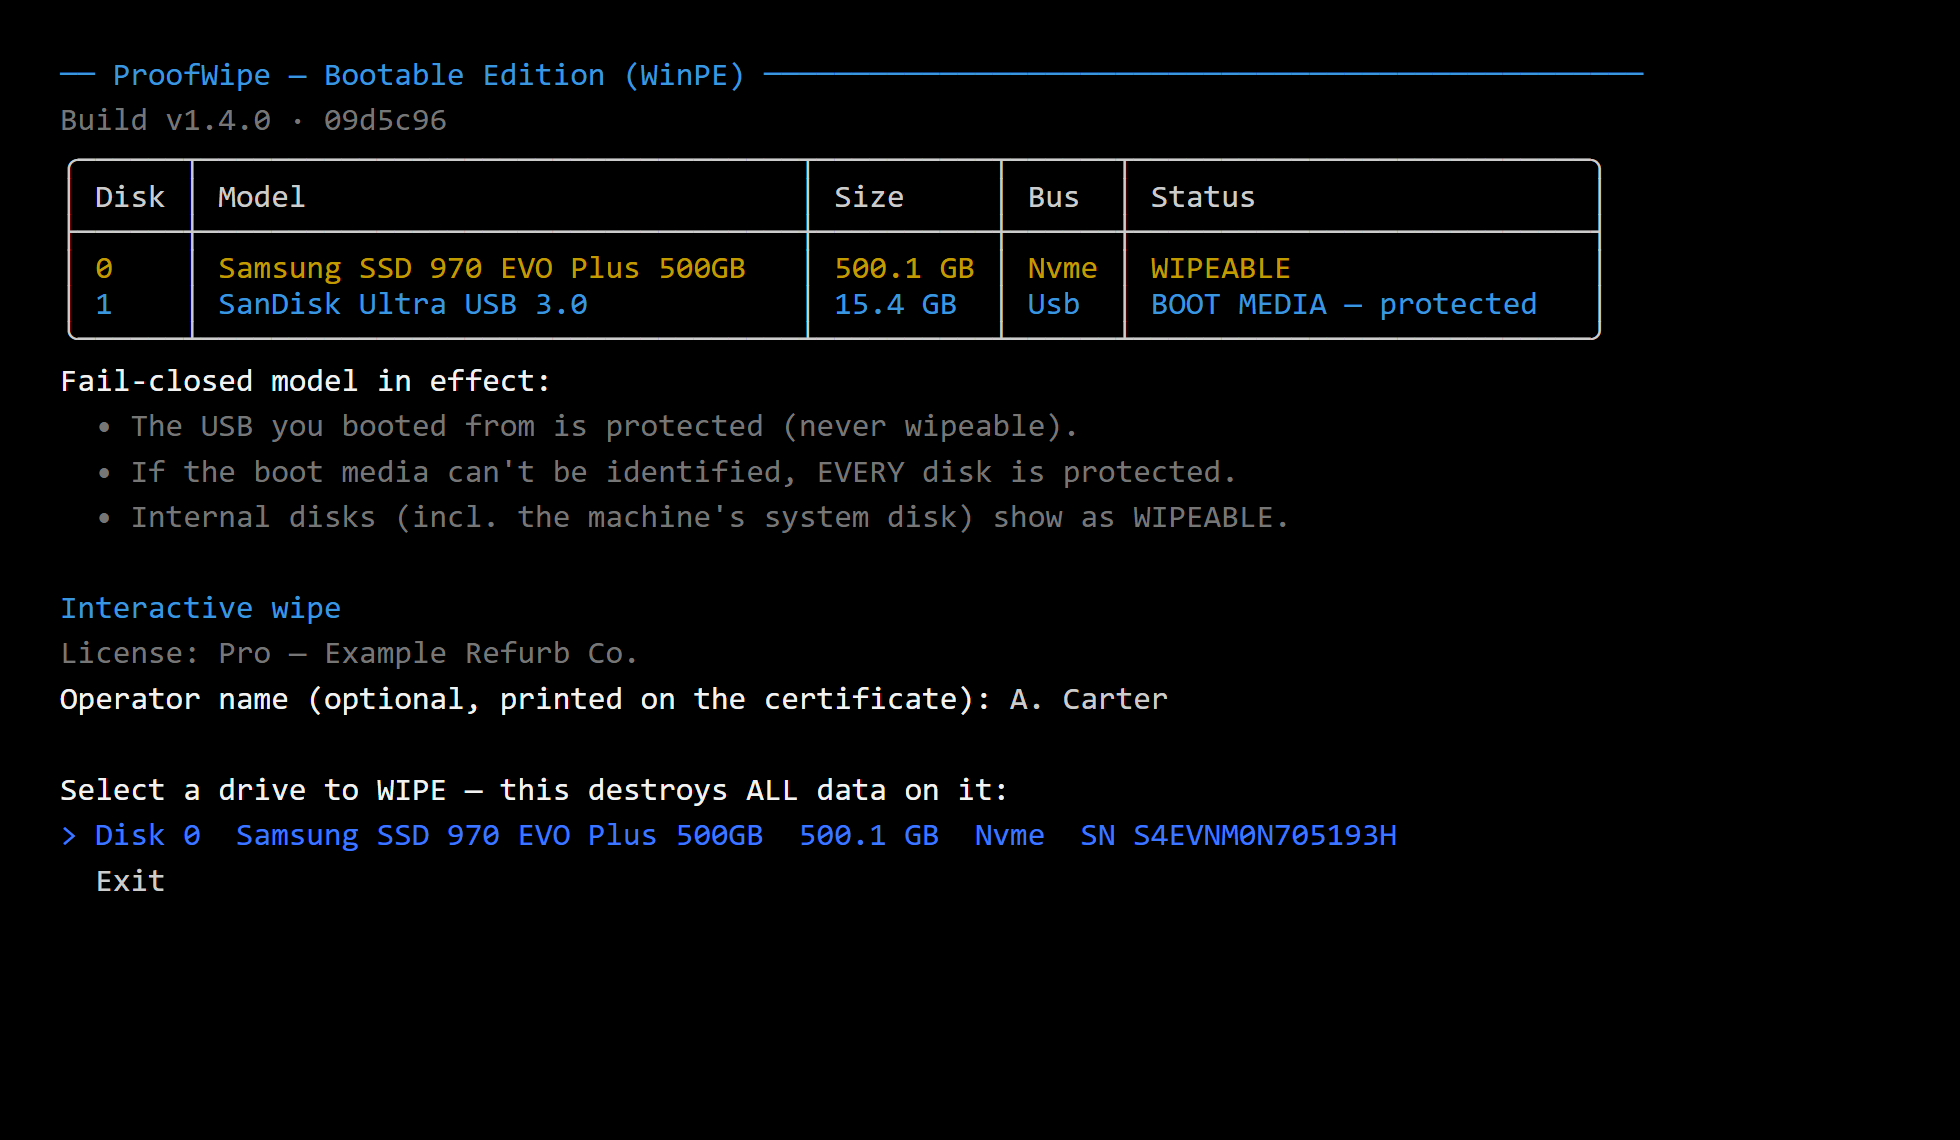
Before it wipes anything, ProofWipe shows you a read-only list of the drives it found. It changes nothing, and it lists each drive's model and real serial number, with the machine's internal drive marked as wipeable and the USB stick you booted from marked as protected. Pick the internal drive, and take a second to confirm the model and serial match the machine in front of you. This is your measure-twice moment.
Step 4: Choose how to wipe, and turn on verification
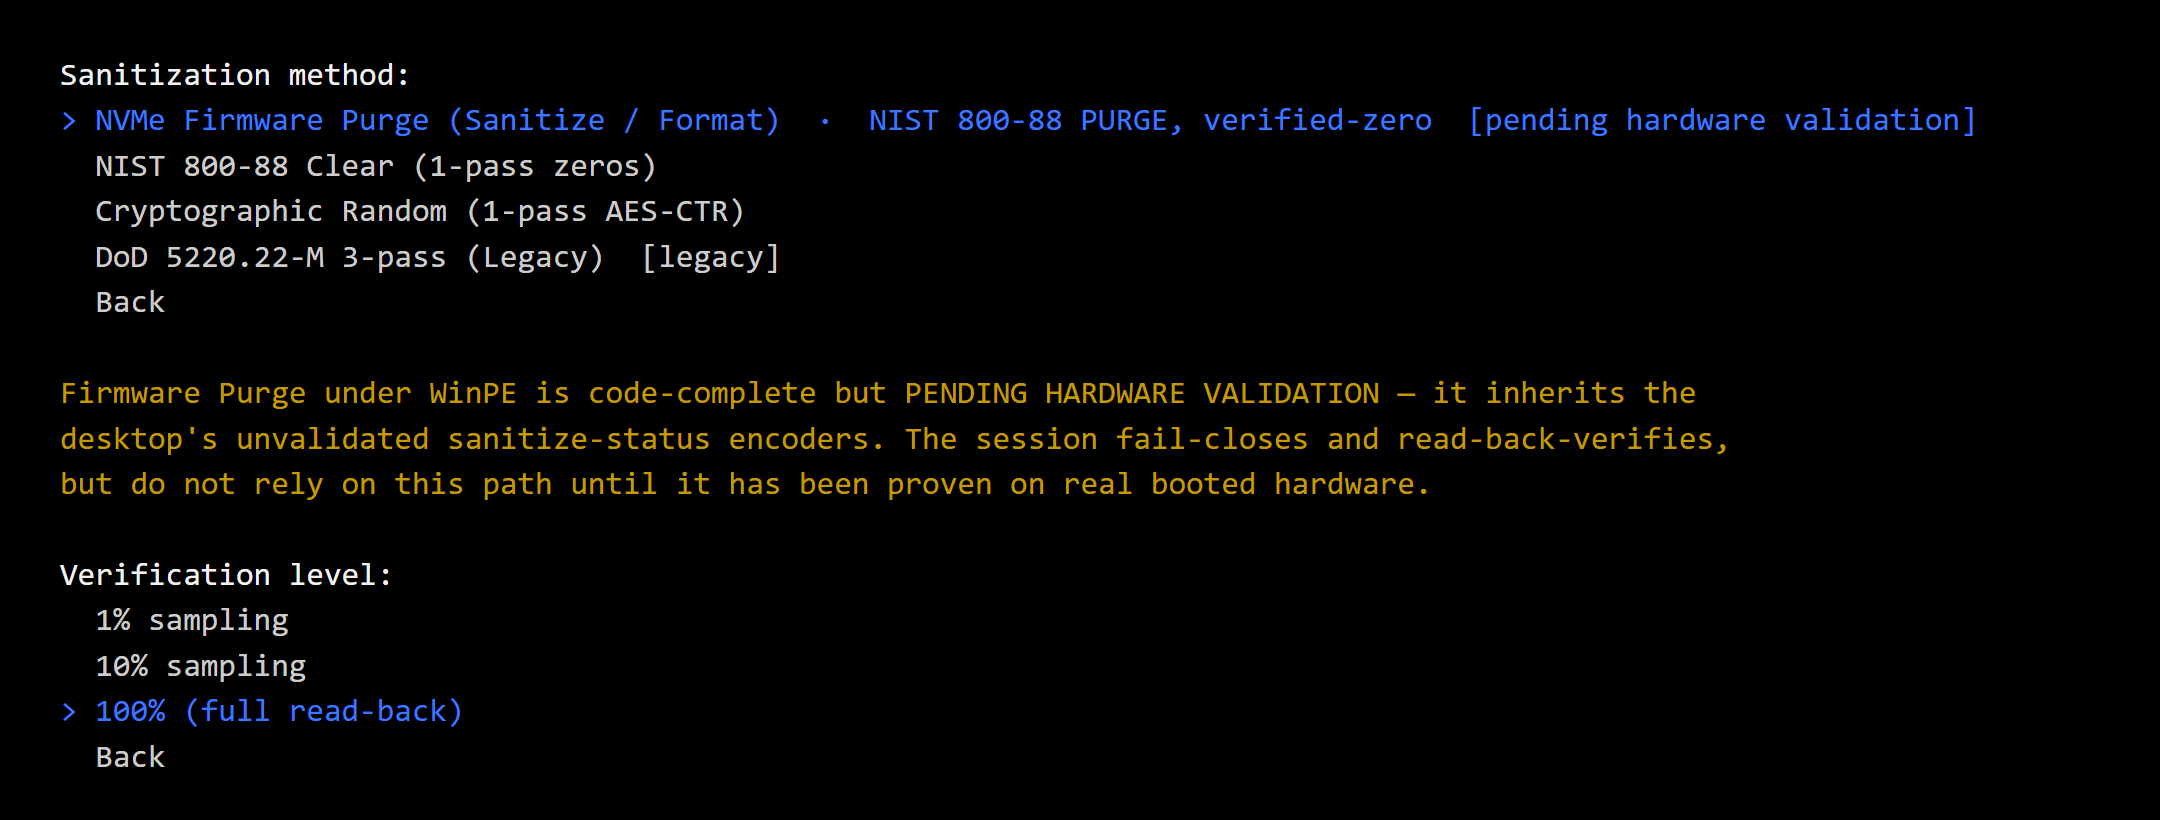
There are two methods, both from the NIST 800-88 standard, which is the recognized guideline for wiping media. Clear overwrites the whole drive and works on any drive. Purge tells the drive's own firmware to sanitize itself, which is the fastest and most thorough option on drives that support it, and it is the right choice for modern solid-state drives. Turn on read-back verification as well, so ProofWipe checks that the data is actually gone afterward, rather than just assuming it worked.
Step 5: Arm it and let it run
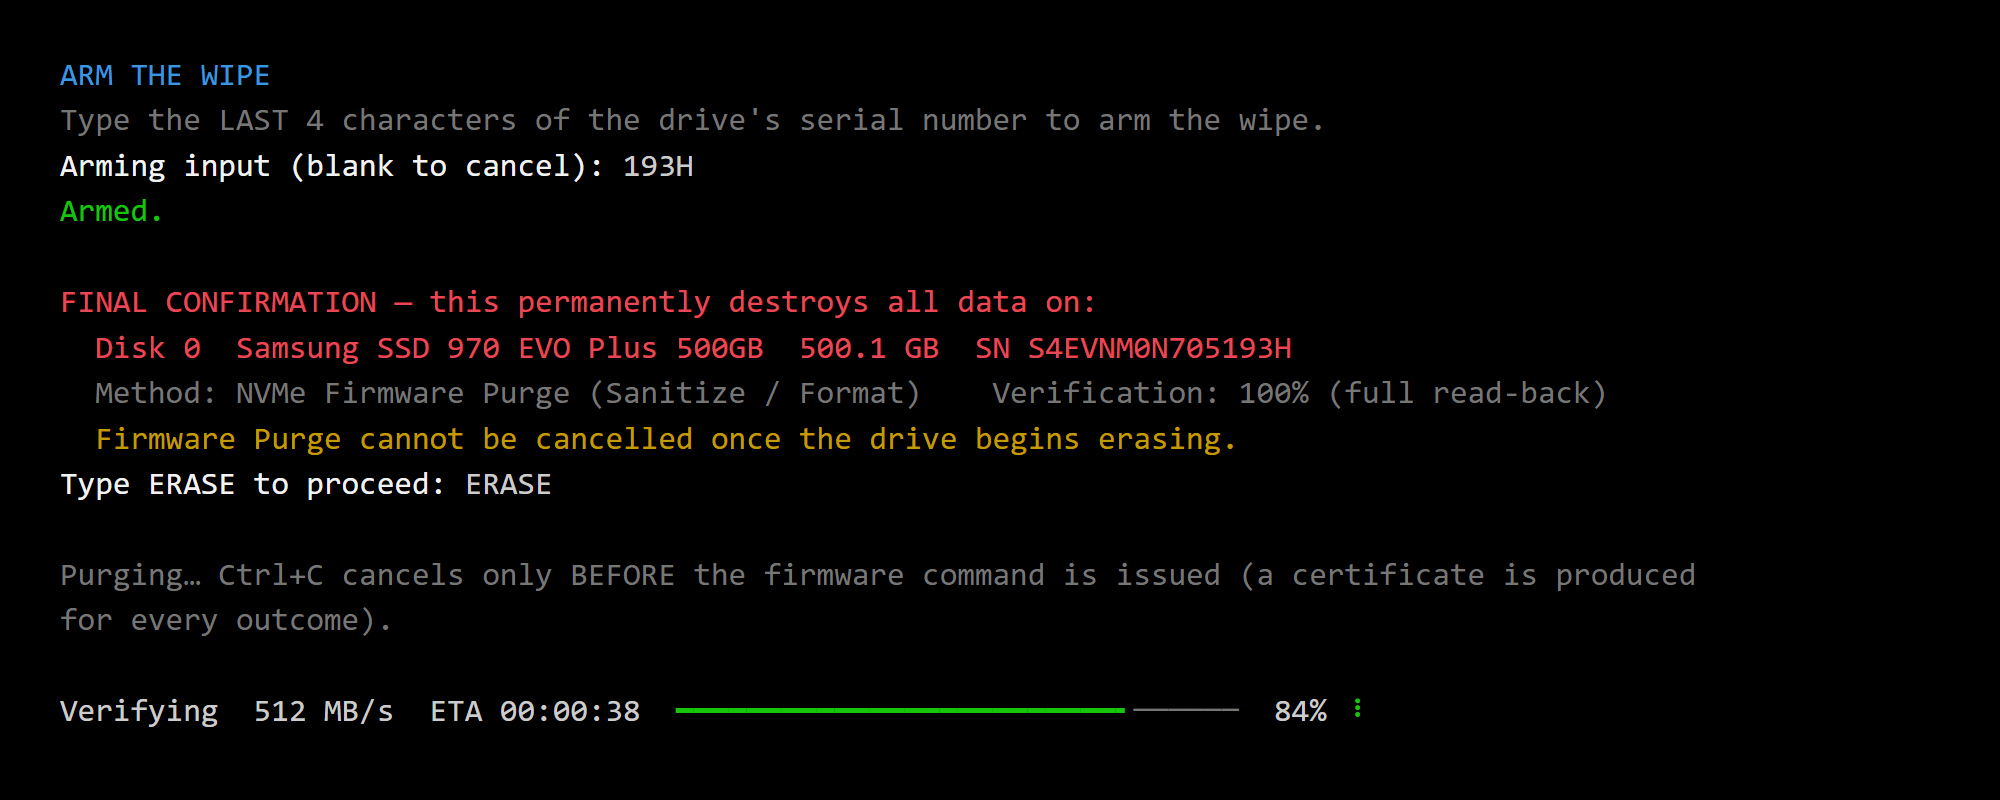
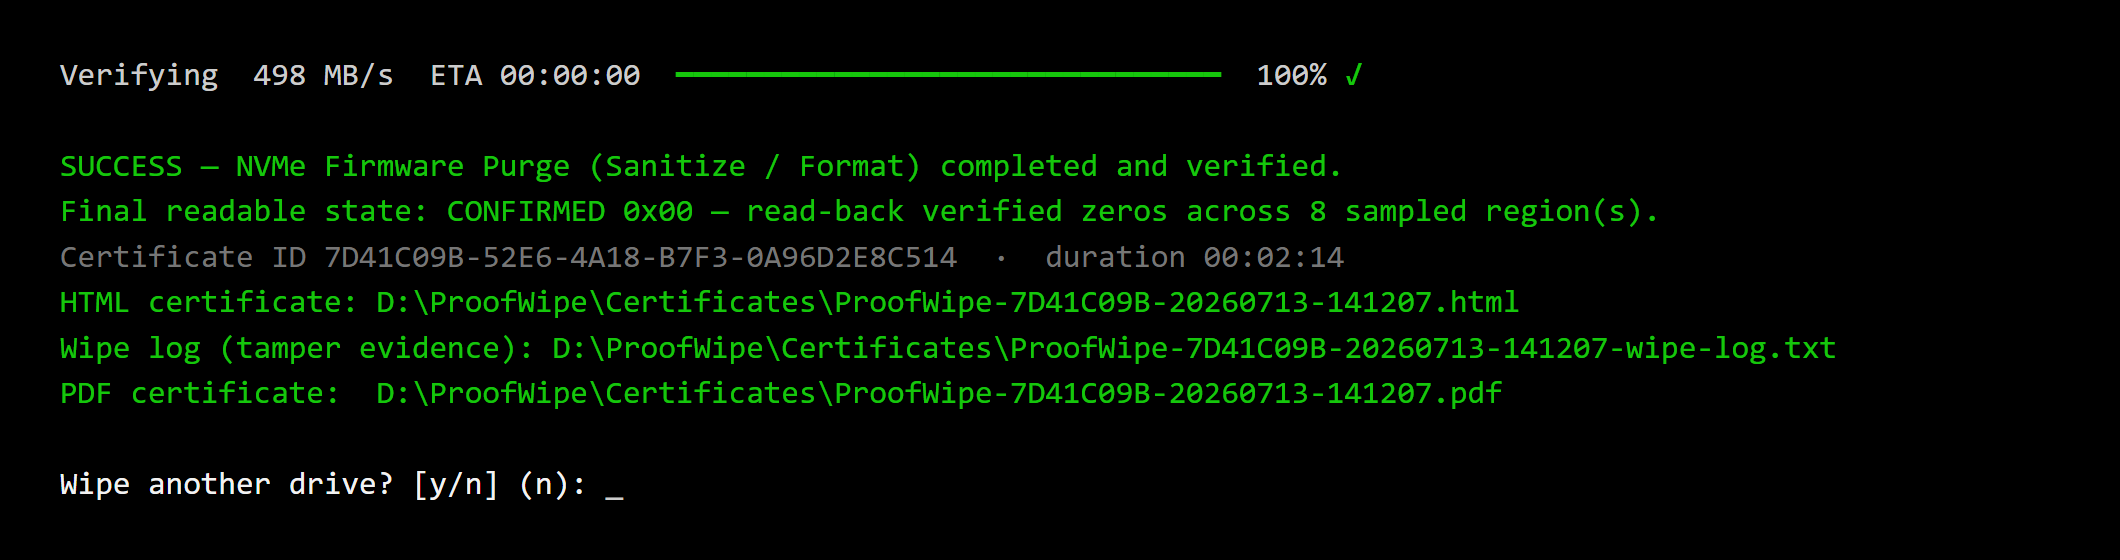
To start a wipe you arm it in two steps, confirming the exact drive by its own identifier. That double check is what makes sure the wrong drive can never be erased by accident. Start it, and let it work. A firmware Purge on a supported drive often finishes in a couple of minutes, while a full overwrite takes longer. If a drive is ever disconnected partway through, ProofWipe stops and reports the wipe as failed. It never reports success it cannot back up.
Step 6: Your proof
When the wipe finishes, ProofWipe writes a certificate and a matching log to the USB stick. The certificate names the drive, its serial number, the method, the verification result, and the date, and it carries a fingerprint that ties it to the log so neither can be quietly changed. Anyone can check a certificate at proofwipe.com/verify, which recomputes that fingerprint right in the browser and confirms it matches. Nothing gets uploaded, it all happens on their side.
Keep your certificate of destruction
For an organization, the certificate is your record that the data was destroyed before the machine left your control, and it is the part auditors, clients, or your own policy will ask about. So it is less about handing something to whoever takes the machine and more about keeping proof for yourself.
Save each certificate and its matching log wherever your organization keeps records: a shared drive, a compliance folder, or a server of your choosing. Name them so you can tie each one back to a machine by serial number or asset tag. If your disposal chain needs it, an ITAD partner, a recycler, or the buyer, you can pass a copy along, but the important copy is the one you keep.
That record is the difference between saying you wiped the machines and being able to show, per device, exactly what was sanitized, by what method, verified, and when.
Common questions
What USB stick do I need? Any stick 2 GB or larger. Make sure there is nothing on it you want to keep, because building the bootable stick writes over everything already on the drive. If the machine you are wiping only has USB-C ports, use a USB-C adapter or a USB-C stick, it works the same way.
Do I have to do the machines one at a time? You reuse the same stick on every machine, so it is one after another, but each one is only a few minutes of your attention.
Does this work on SSDs? Yes. Solid-state drives are exactly where the firmware Purge method shines, because it reaches areas that a plain overwrite cannot.
How long does each machine take? A firmware Purge is fast, and it barely depends on how full the drive is. In our testing, 256 GB SSDs, including one that was nearly full, purged in under two minutes each, so a 256 GB drive should come in under three minutes. A full overwrite (Clear) instead scales with the drive's size and takes longer.
Is this good enough for compliance? ProofWipe implements the NIST 800-88 Clear and Purge methods with read-back verification, which is the recognized standard for media sanitization, and it gives you a documented record of each wipe. Whether that satisfies a specific regulation you are subject to is for you to confirm, but it gives you the standard and the paper trail.
What if the machine's Windows is broken or the drive is a mess? It does not matter. The stick boots the machine on its own, so the computer does not need a working Windows, or even a working drive, to be wiped.
Wiping your old workstations properly takes a few minutes each and leaves you with a certificate for every one. Your machines go out the door clean, and you have the proof to show for it. Get ProofWipe at proofwipe.com.